Sourdough bread is one of my favorite things in this world. It’s great toasted with butter or dipped into soup. I grew up in California so I know exactly what a good sourdough bread bowl with clam chowder tastes like. My memory for food has always been very precise, so when I moved to Panama, imagine my horror at not being able to find good sourdough bread. This started my journey on how to make sourdough starter at home, because the starter is the key to great bread.
Many people are afraid of making sourdough bread because the starter takes so very long in today’s world of instant gratification. If you wake up craving sourdough bread, you can’t make it in time for lunch, but if you’re looking for a baking project that will make you feel like a state fair winner, this is indeed that recipe. I’ve written step-by-step instructions in this beginner’s guide to sourdough starter. If it doesn’t turn out the first time, keep at it! Think about all of the things you were great at the very first time you tried it. For me, that would be exactly zero things. But what I lack in natural ability I make up for in willingness to keep trying.
If you want to know how to make sourdough starter at home, there are two methods–the easy way and the slightly more complicated way. I’ll explain both in this beginner’s guide to sourdough starter, but first some basics
The 3 ingredients you need for this beginner’s guide to sourdough starter are:
- Flour
- Filtered water
- Dry yeast
NOTE: Always use filtered water, as tap water can introduce impurities that will affect the flavor and outcome of your bread.
The kitchen implements you need are:
- Glass or plastic bowl, large enough for the mixture to double in size
- Non-metallic spoon or spatula
NOTES: You never want to introduce metal into sourdough starter or dough as this can dramatically change the flavor of your bread for the worst. Also, make sure your bowl is scrupulously clean. If there is any bacteria in the bowl or jar, this can ruin your batch of starter.
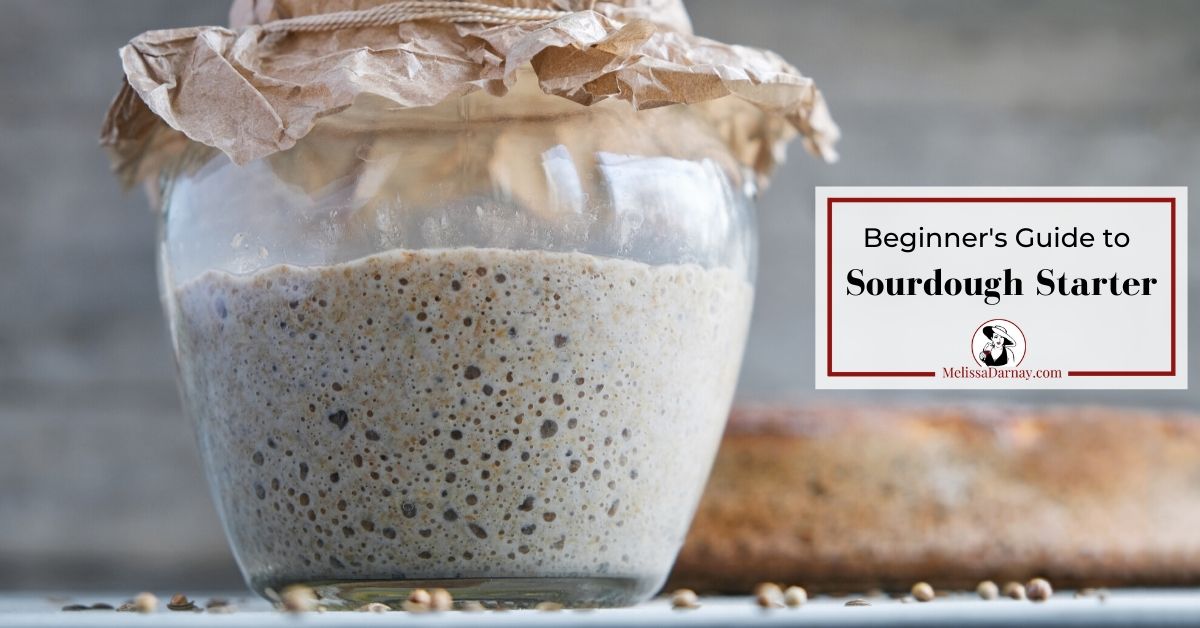
You will want to loosely cover your starter. The point of this is to keep out insects but let oxygen in. Ideas include:
- A glass jar with a loose lid
- A loosely fitted silicone lid
- Cheese cloth secured with a rubber band
- A brown paper bag secured with twine
Before you get into the actual recipes, let’s chat a bit about the different types of flour you can use in this beginner’s guide to sourdough starter. The types of flour blends you can use are endless, and many artisan bakeries have their own flour milled. But for the purpose of keeping this simple, there are three basic types of flour that you can use in your starter.
- All purpose flour. This is the easiest to get and one that most of us have at home…but not the best. If you want to make a practice round, go ahead and use this flour, but as you progress, move on to a better quality of flour.
- Bread flour. This white flour looks and feels like all purpose flour, but it has a higher protein content. The higher protein produces more gluten, which makes your final loaf of bread chewier and denser. I like
- Whole wheat or other whole grain flour. Whole grains contain complex carbohydrates, which produce more acetic acid. This is what makes the bread taste sour. If you like your bread to be more sour, then a whole grain flour is the best option for the starter. It makes a clumpier starter, though, so be prepared for it to be very thick. Sometimes I use whole wheat, but if I can’t find it, I use organic rye flour.
Beginner’s Guide to Sourdough Starter Starter
Method #1: Easy
- 150 grams of all purpose flour (1.5 cups)
- 150 grams of filtered water (105-110 degrees)
- 1 .25-ounce packet of yeast (7 grams)
Mix together ingredients in a glass or plastic container, making sure to dissolve all clumps of flour. Loosely cover the container. Place starter mixture in a warm area for a minimum of 4 days. The longer you let your sourdough starter ferment, the better it will taste. I recommend 5-8 days. Stir daily. If a brown liquid forms on the top of the starter, just stir it back in. This is alcohol from the fermentation process and it is what gives sourdough it’s wonderfully tangy taste. (Don’t worry.. the alcohol will cook off when you bake the bread.)
The starter is ready to use when it is bubbly and smells yeasty. Feed the starter at least once before using it to bake bread. See below for directions.
- 30 grams of whole wheat flour
- 30 grams of all purpose flour
- 60 grams of filtered water (105-110 degrees)
DAY 1:
Combine all ingredients until well mixed. Cover and let sit in a warm area.
DAYS 2-3:
Stir the starter at roughly the same time each day. Re-cover and let sit in a warm area.
DAYS 4-14:
Discard half the starter. Add 30 grams of whole wheat flour, 30 grams of all purpose flour, and 30 grams of room temperature water to your starter. Mix well. Cover and let sit in a warm area.
The starter may be done as early as Day 11. It will be ready when it has a yeasty, sour aroma. The smell should be pleasant, though. If it smells bad or is discolored, throw it away and start over.
The Sourdough Float Test
When the starter is ready, add a teaspoon of sourdough starter to a glass of water. (See the video above.) If it floats, it’s ready to go. If it sinks, feed it and wait a few hours… it’s not ready yet.
Once your starter is ready, it’s time to bake sourdough bread! You can also use it in a variety of baked goods, from sourdough crepes to sourdough crackers.
When you use 200 grams (3/4 cup) of the starter in my sourdough bread recipe, replace with an equal amount of flour and water–100 grams of flour and 100 grams of filtered water. Typically starter is best when used between 5-24 hours from the time it’s fed. If you don’t use it right away, put it in the refrigerator for up to 1 week. The sourdough starter must be fed at least once per week, whether or not you use it.NOTE: You don’t have to mix in equal amounts of flour and water to the amount of starter left over. If you use 3/4 of the starter in a recipe, the smaller amount of starter will feast on the larger amount of fresh flour and water. In fact, having a smaller ratio of starter to fresh flour/water will make the starter stronger. The new flour/water is its food!


0 Comments