
Sourdough is the holy grail of bread making. It’s complicated, but this complexity is what makes it taste so darned good. And once you understand the process… you’ve got it for life! Be prepared to practice this, which is arguably the best sourdough bread recipe for beginners. When you make a perfect loaf, you will feel an amazing sense of accomplishment as the bread gets devoured by all of your friends and family.
As I’ve gone through my journey, I have studied other professionals, watched their videos and tried their recipes. I think what separates this recipe from others out there is that, like you, I am an enthusiast baker. Unlike some of the professionals, you and I will never bake a hundred loaves in a day. We’ll never shape thousands of loaves in our lifetime. Knowing this, I offer some tips, hacks, and shortcuts that the true professional bakers don’t include.
Best Sourdough Bread Baking Tips
Please read the entire recipe before getting started!
- Weigh your ingredients. Bread is much less complicated if the ingredients are precise! If you don’t have a food scale, it’s time to invest in one. It need to be able to hold quite a bit of weight and have a “tare” button to zero-out the bowl and it’s contents.
- Use the right flour. You can make this with all-purpose flour, but I recommend using bread flour. It has a higher protein content and will produce a chewier, more authentic loaf of sourdough. Once you get good at it, you can also mix flours. I like to use a combination of bread flour and “hard wheat” flour. The hard wheat flours are more difficult to work with, so get this down with bread flour first and then start experimenting.
- Wet your hands. When working with the sticky dough, wet hands will keep the dough from sticking to your fingers. You don’t want to introduce extra flour into your dough, so wet hands is the baker’s secret. If you don’t, you’ll spend 8 minutes at the sink trying to wash the dough off of your fingers.
- Do not use metal. A metal spoon or bowl will change the taste of the sourdough starter. Always use plastic, glass or silicone.
- Adjust the salt to taste. All of the measurements are very precise except for the salt since everyone has a different salt tolerance.
Tools for the Best Sourdough Bread Recipe
- Use a Banneton to shape the dough. A Banneton is a round or oval wicker bowl that helps to shape the dough during the last rise before you bake it. This is important if you want a thick crust and a puffy loaf of bread. It’s important to use a high-quality banneton as the cheap ones can leave splinters in your loaf of bread. (Uh, no thanks!)
- Use parchment paper. Professionals are able to use rice flour and nothing sticks, but for those of us who are cooking at home, parchment paper is our best friend.
- Use a Dutch Oven to bake the bread. A Dutch oven is a big pot with a tightly fitting lid. Make sure the Dutch oven you are using is made for high temperatures up to 500 degrees or you could crack the pot. You can get a cast iron Dutch oven that is pretty inexpensive, or a cast iron enamel pot that’s a bit more expensive. On the pricier side are the ceramic pots that are made to last a lifetime. If you don’t have a Dutch oven that’s oven safe (or has an oven-safe lid), I’ve included an easy hack below to get your crust chewy without investing spending any dough.
The Secret to Making the Best Sourdough Bread
The secret to sourdough bread is a high-hydration dough. That means that the amount of water to flour is higher than normal. Professional bakers with the right tools and a lot of experience may make bread that is over 80% hydration. This is very sticky dough to work with and is not easy for beginners. The best sourdough bread recipe that I am sharing is perfect for beginners as it is only 63% hydration. This dough will be slightly stickier than you’re used to with traditional bread, but it won’t be so sticky that you can’t work with it.
Best Sourdough Bread Recipe
520 grams bread flour (about 3 1/2 cups)
300 grams filtered water (about 1 1/3 cups)
10-15 grams of salt (about 1-2 tsp.)
Day 1:
Day 2:
Step One – Float Test
- Test your sourdough starter the “float” test. (See video below)
- If your starter doesn’t float, feed it again with a mini-feed of 50 grams of flour and 50 grams of filtered water.
- Keep the starter at room temperature for 2-3 hours. Then test it again.
- Once the starter floats, you’re ready to go to Step 2.
Step Two – Autolyse
The autolyse period is essential to hydrate the dough and build gluten.
- Mix the flour, water and starter until just mixed (but not kneaded). If you are using a stand mixer, this will take 45-60 seconds using your dough hook.
- Turn off the mixer, and cover the bowl with plastic wrap or a silicone lid and let it rest for a minimum of 30 minutes.
Step Three – Knead Dough & First Rise
- Add the salt and knead the dough until it can pass the windowpane test. (When you stretch a piece of dough, it will hold together and become so sheer that’s you could see through it.)
- If you are using a stand mixer, mix on medium-low speed for about 7-8 minutes. (NOTE: Kitchen Aid stand mixers are air cooled. You may need to turn the mixer off for 1-2 minutes if it starts to get hot.)
- Put the bread dough into a well-oiled glass or plastic container that is at least 2 times larger than the dough ball. You want to allow the dough room to rise. **Do not use a metal bowl! The dough will be sticky. Wet your hands to make the dough easier to work with.
- Cover the dough with plastic wrap or a silicone lid and place it in a warm area for 4-5 hours, until almost doubled. **If you live in a hot climate like I do, find a cool area for it to rise so it doesn’t get “flabby.”
Step Four – Stretch and Fold
- Perform 4 stretch and folds, allowing the dough to rest for 30 minutes after each stretch (see video below). Again, wet your hands before working with the dough so it doesn’t stick to your hands.
- Put the dough on a lightly floured surface, pre-shaping into a round ball. Cover and let it rest for 30 minutes. **To be environmentally friendly, I cover the dough with a large bowl to keep out extra air without having to use plastic.
- Shape the dough and place it seam-side up in a Banneton basket lightly dusted with rice flour. **Note: Regular flour will form gluten causing it to stick. Rice flour won’t do this and will release easier.
- Cover and refrigerate 12-36 hours.
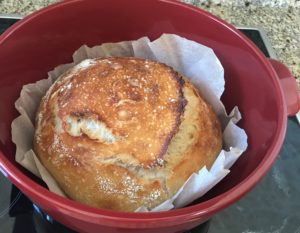
The Wine Maven’s Hack: If you don’t have a Banneton basket, use a medium-sized stew pot or Dutch oven with tightly fitting lid. (Not the one you’re going to bake the bread in.) Line it with parchment paper, sprinkle it with flour, and place the dough seam-side down in the center. Cover and refrigerate for 12-36 hours. When it’s time to bake, transfer the dough by lifting the parchment paper out and putting it in the HOT Dutch oven or stew pot.
Day 3
- Arrange the racks in the oven so one shelf is about half way down from the top of the oven, and the other one is at the lowest part of your oven. Place your large Dutch oven or covered stew pot on a lower rack. Preheat your oven to 450 degrees. This typically takes 20-30 minutes.
- Remove the hot covered pot from the oven. Use the parchment paper as a cradle to transfer the dough to the hot pot.
- Use a sharp serrated knife or razor blade to slice through the top of the dough. I like to use my sharp kitchen shears and make little snips. You can make an “X” on top or cut a semi-circle in the traditional sourdough “ear” method. This allows the steam to escape so the loaf doesn’t explode. (Similar to how you cut through the skin of a whole potato before you bake it.)
- Working quickly, cover the pot and return it to the oven.
- Cook for about 30 minutes. Then remove the lid of the pot and continue baking or another 10 minutes. **Note: The first few times you bake sourdough bread recipe, watch the crust. You want it browned but not burned. You may need to cook it covered for up to 34 minutes, and then uncovered for a mere 6 minutes. This will depend on your oven.
- Pull the loaf out of the oven and remove it immediately from the hot pot. Place it on a wire rack to cool. (The wire rack allows it to cool evenly by letting the air flow under the loaf as well as on top.) Wait at least 45 minutes before cutting into the loaf! Sourdough bread continues to cook as it cools. If you cut into it too early, the crumb will be irrevocably damaged. It will be a long hour to wait as you smell that amazing sour aroma, but I promise you that your patience will be rewarded.
To Be the Best Sourdough Bread Recipe, the Crust Needs Steam
The perfect chewy crust needs steam during the first 10 minutes of baking. Professional bakers have special ovens that produce steam. Using a Dutch oven or covered stew pot mimics this, but if you don’t have a Dutch oven, I’ve perfected a hack that will get you 85% of the way there.
- Preheat your oven to 450 degrees.
- Put a kettle of water on to boil. (You need boiling water to make steam in your oven.)
- Place your bread on a cookie sheet or silicone baking tray.
- About 5 minutes before your oven has pre-heated, place a 9” x 13” pan on the lowest shelf.
- When you place the bread in the oven, pour the boiling water in the hot 9″ x 13″ pan.
- Close the oven door as quickly as possible to retain the steam in the oven.


0 Comments
Trackbacks/Pingbacks